Installation of HD 80cm satellite dish Slough
When ordering the service Installation of satellite dish HD 80cm Slough , the customer will receive a new satellite dish with a single converter, cable for the decoder and wall bracket.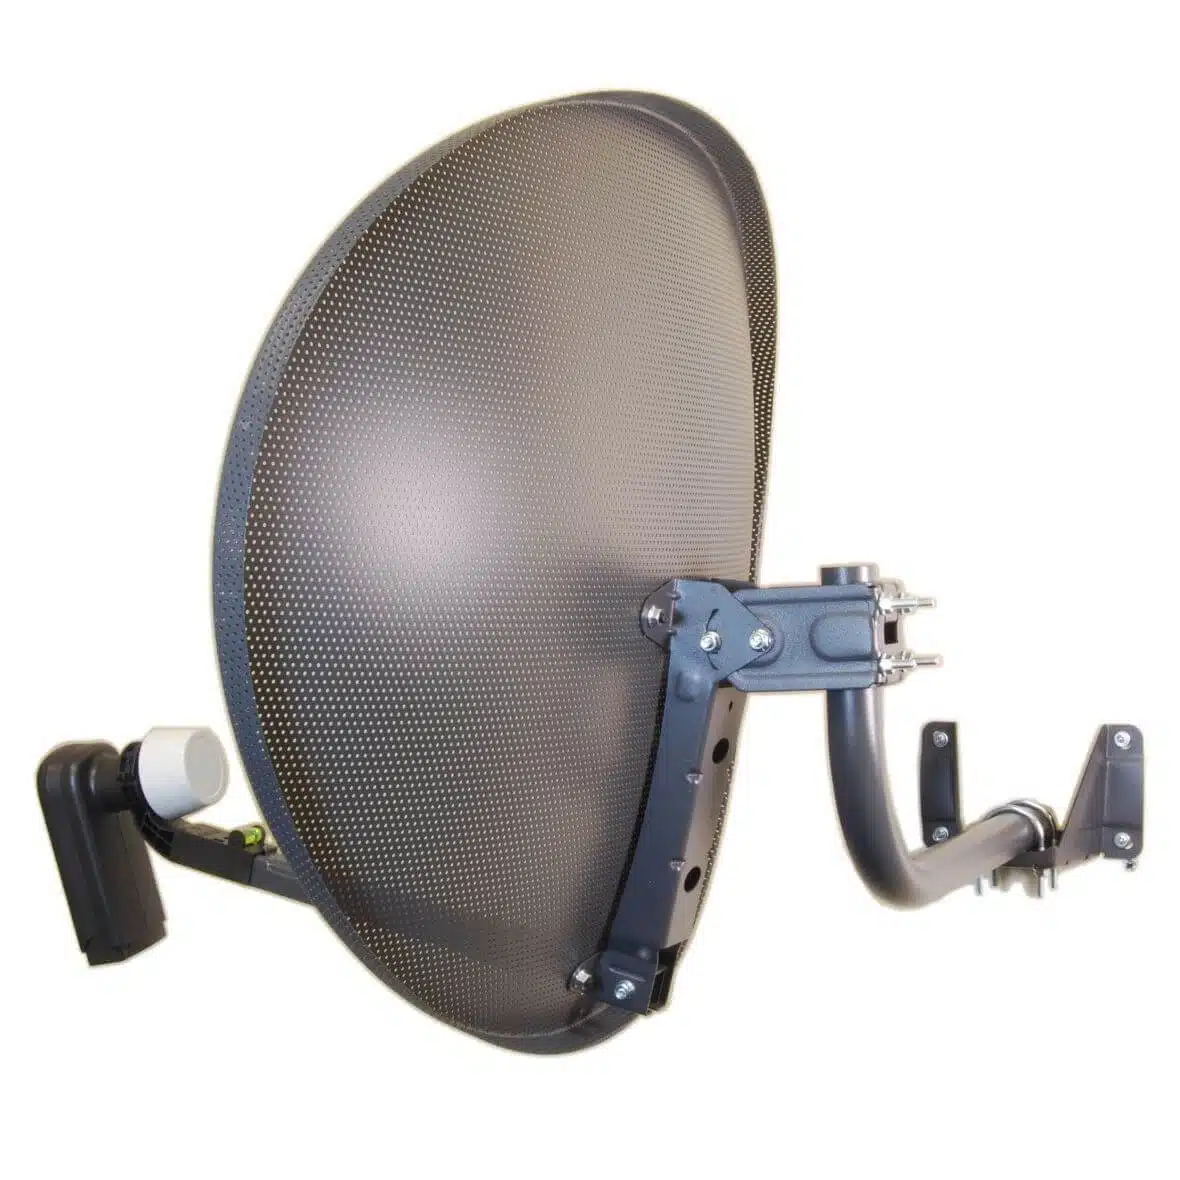
If you need installation with dual cable and converter or installation for more decoders such as multi-room, please inquire through the contact form.
If your antenna has worked for the past few years and now it has lost the signal, or you are having trouble receiving HD channels, it means you have too small an antenna
We offer installation of a satellite dish of the appropriate size (80cm) to receive the new DVBS-2/MPEG-4 encoding system.
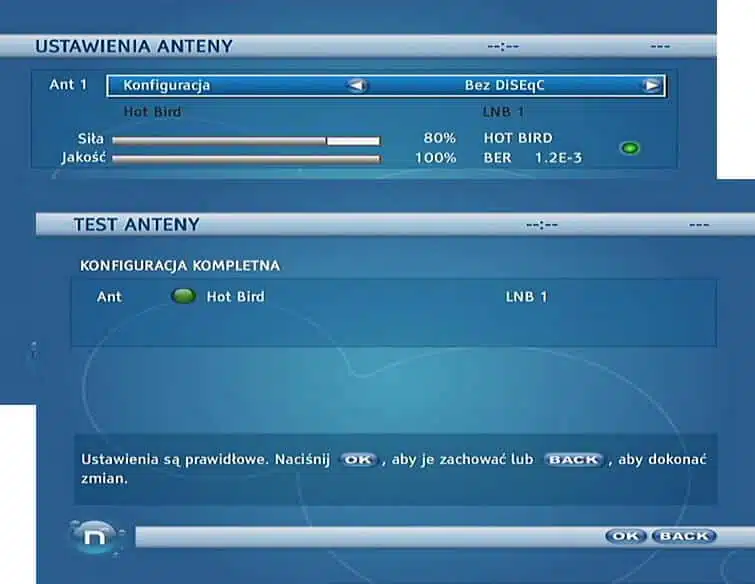
On our antenna we GUARANTEE a very high quality satellite signal.
Place and scope of service
Slough as well as in the following diels and towns
Brentford, Chiswick, Twickenham, Cranford, Feltham, Heston, Slough, Isleworth, Northolt, Perivale, Southall, Uxbridge, Staines, Cherstey, Harrow, Hayes, Ruislip, , Colnbrook, Windsor, Maidenhead, High Wycombe, Langley, Farnham, Stanwell, West Drayton, Harlington and surrounding areas.
Additional information
In the body of the order, please specify the preferred date and time slot, as well as the exact installation address and contact phone number,
or call 07988424050
Come on!
Also, you can install the antenna yourself!
In many cases, this is not difficult. Before you decide to start installing the antenna yourself, read the following instructions.
Self-installation is easier if:
1. the place of mounting the antenna is easily accessible and does not require work at height (garden, terrace).
2. the building is your property and is not subject to conservation protection.
3. the distance from the antenna to the Decoder is not large (not more than 30 m) and there are not many obstacles along the way.
4. fixing the antenna does not require drilling through ceilings and thick walls.
5. have a second person to help.
Before installation:
1. choose a place to install the antenna – it should provide visibility of the sky in the southern direction.
2. gather materials and tools:
– antenna set, i.e. an antenna with a converter (for the PVR BOX+ decoder we recommend a Twin type converter)
– antenna mast or bracket mounted to the wall or balustrade (sold separately)
– 75 Ohm antenna cable suitable for satellite installation, suitable for outdoor use (you will need two sections of cable to build a full HD Decoder with recorder installation)
– “F” type connectors, matched to the diameter of the coaxial cable
– wrenches and tools needed to fix the mast, a drill with a hammer and drill bits for walls
– compass, protractor, ruler
– cable ties or glue, insulating tape, wall plugs, etc., and if it is not possible to make a hole to run the cable a special flat section of cable with “F” type connectors, connectors for lightning installation
3. For shopping, go to a good satellite equipment store and a DIY store.
Attention!
In the case of PVR BOX+, we recommend that you bring two independent signals from the Hot Bird satellite, that is, two cables routed from the double LNB (Twin type). The use of an ordinary antenna installation with a single coaxial cable is possible when the ANT 2 antenna input is disabled. In this case, however, the recording features will be limited, and the VOD+ offering will require more time for upgrades. We recommend using this option only in exceptional cases.
Installation of a mast or antenna bracket
The mast should be a steel pipe with the outer diameter recommended in the antenna installation instructions (about 35 – 45 mm). Satellite antenna stores stock various types of antenna mounts that attach to a wall, horizontal railing or pole.
1. choose a bracket suitable for the installation site.
2 The mount should be fixed to a rigid surface and very solidly, due to the possible consequences of falling antenna.
(3) In buildings equipped with a lightning protection system, the mast should be connected to it (with 50mm2 Cu or 80mm2 Fe wire), and the external conductors of the antenna wires should be connected to the mast (with 40mm2 Cu wire).
(4) The above security requirements do not apply if the antenna is placed lower than 2 meters from the top of the roof and closer than 1.5 meters of the wall from the building, for example, on the balcony.
Cable routing
1. a good quality cable of 30 meters (a longer cable requires a signal amplifier), which will connect the antenna set to the BOX+ decoder, does not affect the quality of reception. We advise against combining the cable from several sections unless the only way to get the signal from the antenna to the interior of the building is to use a special connector, placed in the window in the form of a section of flat cable.
(2) The cable should be fixed and routed where there is no risk of tripping over it or damaging it.
3. avoid sharp bending of the cable.
4. if the converter is equipped with a special gasket to prevent water penetration, put it on the cable before seating the plugs (converters with sliding housing do not require a gasket).
5.After checking the length of cable you need, buy a section with at least a 3-meter reserve. If you have a larger amount of it cut the cable only after it has been laid.
6. “F” type connectors should be screwed tightly onto the coaxial cable, using pliers if necessary (it is better to use a special wrench). It is important to carefully prepare the cable and check that parts of the metal braid of the coaxial cable do not touch the center conductor.
Installation and initial alignment of the antenna
Connect the various parts according to the instructions provided with the antenna. Be careful not to twist the surface of the antenna canopy).
After installing the converter, we pre-adjust the angles of converter A and elevation B, which are marked in the figures below.
Summary of the values of the angles needed to position the antenna:
Adjusting the angle of the converter – A
1. if there is a scale on the converter, or you have a protractor, rotate the converter in the mount by the angle A read from the table, appropriate for the nearest city.
2. angle A measure from the vertical, counterclockwise, looking at the antenna from the front, from the converter side. At this stage of installation, the exact angle A is not necessary. You will make corrections in the final phase of antenna adjustment.
3. use the mounting screws to lock the converter setting in the boom mount.
Setting the elevation angle – B
The second step is to set the B angle – the so-called “B” angle. elevation angle, that is, the angle at which the antenna “looks up.”
1. set the angle according to the scale, which is located on the antenna mount, taking into account any deviation of the mast from the vertical. This is not the upward angle of the antenna, because offset parabolic antennas already “look” upward when the canopy is mounted vertically. If there is no pitch, you can start with a near-vertical canopy position.
2 Block this setting temporarily with the screws used to adjust the tilt of the canopy.
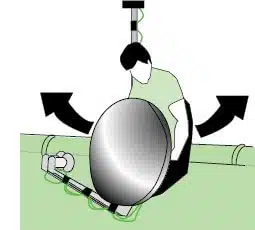
Setting the direction of the antenna (angle C)
The third step is to set the angle C (azimuth minus 180º). It is counted from the south direction clockwise.
1. mount the antenna on the mast and set the angle C.
2 Screw the wires to the converter and to the receiver.
3. connect the decoder to the TV according to the instructions and start it up.
Trust the professionals with years of experience and join the multitude of satisfied customers of our company.